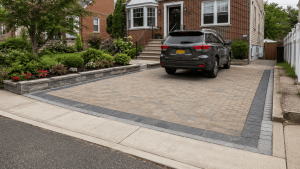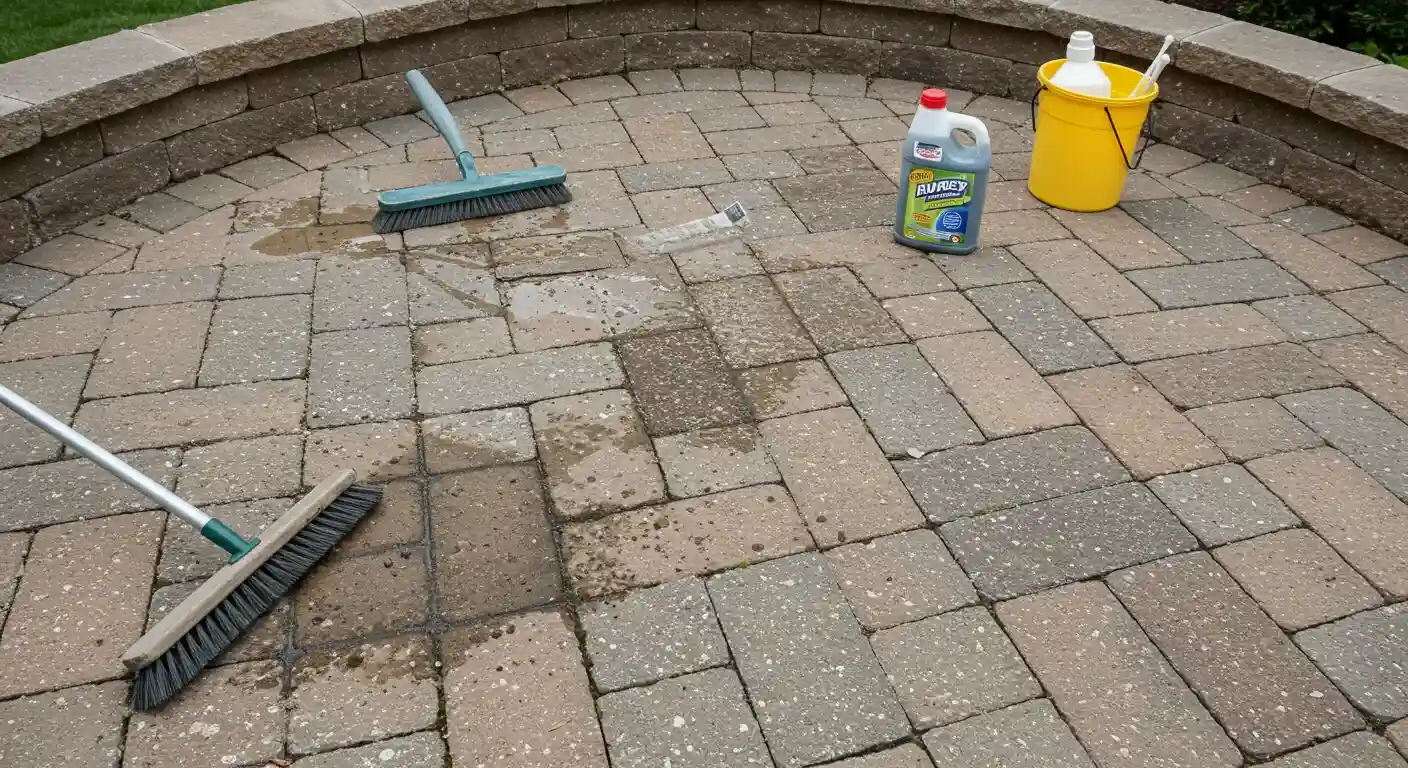
The safest way to clean most patio pavers is to begin with the least aggressive method: remove loose debris, rinse the surface, apply a mild pH-neutral cleaner or manufacturer-approved detergent, scrub with a nylon brush and rinse thoroughly.
Do not begin with strong acids, undiluted household cleaners or maximum-pressure washing. The correct method depends on whether your patio contains concrete pavers, clay brick, porcelain or natural stone. A cleaner that works on one surface can stain, dull or etch another.
For routine dirt and grime, a mild soap-and-water solution is often sufficient. Unilock recommends starting with soap and water or a mild detergent, followed by gentle scrubbing or rinsing.
Quick cleaning method
-
Identify the paver material.
-
Sweep away leaves, soil and loose debris.
-
Test the proposed cleaner in a hidden area.
-
Rinse the patio with clean water.
-
Apply a mild, compatible cleaner.
-
Scrub gently using a nylon-bristle brush.
-
Rinse before the cleaner dries.
-
Allow the patio to dry.
-
Inspect the joints for missing sand.
-
Treat remaining stains with a product designed for that specific stain and paver material.
What Does “Without Harsh Chemicals” Actually Mean?
Cleaning without harsh chemicals does not mean that every household ingredient is automatically safe.
White vinegar, baking soda, dish soap and other common products can still affect pavers, sealers, surrounding plants and joint materials. The safest approach is to use the least aggressive product that can remove the specific type of dirt or stain.
For ordinary maintenance, that normally means:
-
Clean water
-
A mild detergent
-
A pH-neutral paver cleaner
-
A nylon or non-metal brush
-
A garden hose
-
Controlled, low-pressure washing only when necessary
For oil, rust, efflorescence, paint or deeply embedded stains, a specialised cleaner made for the exact surface may be safer than experimenting with an acidic homemade mixture.
Always follow the selected paver manufacturer’s care instructions and the cleaner manufacturer’s dilution, dwell-time and rinsing requirements.
Identify Your Patio Paver Material First
Before applying anything, determine what the patio is made from.
Concrete pavers
Concrete pavers are porous and can absorb oil, grease, organic stains and cleaning products. Strong acid, excessive pressure or an incompatible cleaner can affect the face or colour.
For routine maintenance, begin with water and a mild detergent. Unilock recommends testing specialised paver cleaners on a small area and following the cleaner manufacturer’s instructions.
Clay brick pavers
Clay paving brick can respond differently from concrete products. Cleaner compatibility can also depend on the brick finish, age, joint material and whether the surface was sealed.
Use a cleaner approved for clay or masonry rather than assuming a concrete-paver product is suitable.
Natural stone
Natural stone needs the most cautious approach.
Limestone, marble, travertine and other calcium-based stones can be dulled or etched by vinegar, lemon and other acidic products. The Natural Stone Institute specifically warns that acids can etch calcareous stone and that abrasive cleaning products may scratch certain stone surfaces.
Use:
-
Clean water
-
A pH-neutral stone cleaner
-
A soft or medium nylon brush
-
A treatment approved for the specific stone
Do not apply vinegar as a general natural-stone cleaner.
For damaged or heavily stained stone, review our natural stone installation and repair services in NYC.
Porcelain pavers
Porcelain pavers are generally less porous than many concrete and natural-stone products, but the surface finish, grout, joint material and installation system still matter.
Use clean water and a product approved by the porcelain manufacturer. Avoid abrasive brushes or powders that could alter a textured or finished surface.
Sealed pavers
A cleaner that is safe for an unsealed concrete paver may affect an existing sealer.
Before cleaning sealed pavers, identify:
-
The type of sealer
-
When it was applied
-
Whether it is peeling, cloudy or discoloured
-
Whether the cleaner is approved for sealed surfaces
Test a small area before cleaning the full patio.
Cleaning Tools and Materials
For a normal maintenance cleaning, prepare:
-
Outdoor broom or leaf blower
-
Garden hose with spray nozzle
-
Two buckets
-
Mild or pH-neutral cleaner
-
Nylon-bristle deck brush
-
Small nylon brush for joints
-
Clean absorbent towels
-
Protective gloves
-
Eye protection
-
Plastic sheeting where plants need temporary protection
Avoid using:
-
Wire brushes
-
Metal scrapers
-
Undiluted acids
-
Muriatic acid
-
Toilet-bowl cleaner
-
Random rust removers
-
Multiple cleaners mixed together
-
Maximum-pressure washing directly into joints
Never mix cleaning products unless the manufacturer specifically instructs you to do so.
Step-by-Step: How to Clean Patio Pavers Safely
1. Remove furniture and planters
Clear the patio so the entire surface is visible.
Lift furniture rather than dragging it across the pavers. Check metal furniture legs and plant containers for rust marks, trapped moisture or organic stains.
2. Sweep the entire patio
Remove:
-
Leaves
-
Dirt
-
Mulch
-
Food debris
-
Loose moss
-
Weeds
-
Joint debris
Organic material left on damp pavers can contribute to staining and recurring moss or algae.
Regular sweeping also prevents debris from collecting in the joints.
3. Inspect the patio before washing
Look for:
-
Loose or rocking pavers
-
Missing joint sand
-
Surface cracks
-
Sunken sections
-
Standing water
-
White mineral deposits
-
Rust stains
-
Oil or grease
-
Failed sealer
-
Moss concentrated in damp areas
Cleaning can improve surface appearance, but it will not repair settlement, drainage problems or unstable joints.
4. Test the cleaner
Choose a hidden corner or spare paver.
Apply the cleaner using the proposed dilution and method. Allow the test area to dry fully before deciding whether the result is acceptable.
Testing is especially important for:
-
Coloured concrete pavers
-
Sealed surfaces
-
Natural stone
-
Older patios
-
Previously treated pavers
-
Specialised stain removers
Paver manufacturers commonly advise testing a small, inconspicuous area before treating the full surface.
5. Rinse the surface
Use a garden hose to rinse dust and loose grime.
Work in the direction of the patio’s drainage. Avoid pushing soil, dirty water or loosened joint material into planting beds, neighbouring properties or drains.
A hose may be enough when the patio only has light dust and surface dirt.
6. Apply a mild cleaner
Mix the cleaner according to its label.
Work in manageable sections so the cleaner does not dry on the pavers. Apply the solution evenly rather than pouring a concentrated amount onto individual spots.
For general maintenance, a mild detergent or pH-neutral paver cleaner is preferable to beginning with vinegar or another acidic substance.
7. Scrub with a nylon brush
Use a nylon-bristle deck brush and scrub in multiple directions.
Pay extra attention to:
-
Textured paver faces
-
Areas under furniture
-
Grill zones
-
Shaded corners
-
Low areas
-
Borders
-
Joints containing organic debris
Do not use a wire brush. Metal bristles can scratch the surface and may leave particles that later create rust marks.
8. Rinse thoroughly
Rinse the cleaner away before it dries.
Residue left on the patio may create streaking, attract dirt or affect the appearance of the pavers.
Repeat the mild-cleaning process before moving to a stronger product.
9. Let the patio dry
Allow the pavers and joints to dry so you can distinguish remaining stains from temporary darkening caused by moisture.
Once dry, inspect:
-
Surface colour
-
Remaining marks
-
Joint-sand levels
-
Sealer condition
-
Low areas
-
Drainage
10. Treat remaining stains individually
Do not apply one aggressive product to the entire patio because a few small stains remain.
Identify the stain and use a treatment intended for that specific problem.
Patio Paver Stain-Removal Guide
| Problem | Begin with | When to use a specialised product | Avoid |
|---|---|---|---|
| Dirt and grime | Water and mild cleaner | When normal scrubbing does not work | Strong acid |
| Food or drink | Blot, mild detergent and water | Persistent organic stain | Rubbing the spill deeper |
| Fresh oil or grease | Blot and absorb the excess | Remaining dark stain | Spreading it with water |
| Old oil stain | Paver-safe degreaser | When the stain has penetrated | Random solvents |
| Rust | Remove the metal source | Paver-compatible rust remover | Household rust remover without testing |
| Efflorescence | Confirm it is mineral deposit | Paver-specific efflorescence cleaner | Aggressive acid treatment |
| Moss or algae | Remove debris and scrub | Recurring or widespread growth | Ignoring the moisture source |
| Paint | Blot fresh paint | Approved paint or coating remover | Smearing or wire scraping |
| Failed sealer | Professional assessment | Sealer-removal system | Applying new sealer over failure |
How to Remove Oil and Grease From Patio Pavers
Act quickly when cooking oil, grill grease or another oily liquid spills.
For a fresh spill
-
Blot the liquid with an absorbent towel.
-
Do not rub it across the surface.
-
Apply a compatible absorbent material.
-
Remove the absorbed material.
-
Clean the spot using mild detergent and water.
-
Rinse and allow it to dry.
For a remaining stain
Use a degreaser designed for the paver material and sealer condition.
Techniseal produces surface-specific cleaners that dissolve and remove oil and grease from pavers, concrete, brick and certain natural-stone surfaces. Its instructions distinguish these products from ordinary general cleaners.
For more detail, link to the existing guide on removing oil stains from pavers.
How to Remove Rust Stains
Rust commonly comes from:
-
Metal patio furniture
-
Plant-pot stands
-
Fertiliser granules
-
Tools
-
Railings
-
Irrigation water
-
Rusting fasteners
First remove or correct the source. Otherwise, the stain will return.
Use a rust remover specifically approved for the paver material. Techniseal’s concrete-paver rust remover is designed for stains caused by rusted metal and fertiliser, while its instructions warn users to follow the product specification.
Do not apply a general household rust remover without confirming that it is compatible with the paver and sealer.
The Natural Stone Institute warns that some household rust removers contain acids capable of attacking stone.
How to Handle Efflorescence
Efflorescence usually appears as a white or light-coloured mineral deposit on concrete or masonry surfaces.
Do not assume every pale stain is ordinary dirt.
Begin by confirming:
-
The paver material
-
Age of the installation
-
Whether the deposit returns after cleaning
-
Whether drainage or moisture is contributing
-
Whether a sealer is present
Use an efflorescence cleaner specifically formulated for concrete pavers when treatment is appropriate. Cambridge advises using a commercially formulated product, following the label and testing a small area because improper cleaning can cause surface damage or discolouration.
Techniseal also produces dedicated efflorescence cleaners that differ from routine soap-and-water cleaning.
Do not treat the entire patio with undiluted vinegar simply because a white deposit is visible.
How to Remove Moss and Algae
Moss and algae frequently return when the underlying conditions remain unchanged.
Common contributing conditions include:
-
Persistent shade
-
Poor airflow
-
Standing water
-
Low sections
-
Clogged joints
-
Organic debris
-
Nearby irrigation
-
Drainage toward the patio
Gentle cleaning process
-
Sweep away leaves and debris.
-
Remove loose growth using a plastic tool or nylon brush.
-
Wet the surrounding area.
-
Apply a cleaner approved for the paver material.
-
Scrub gently.
-
Rinse thoroughly.
-
Allow the surface and joints to dry.
-
Correct the moisture source where possible.
For recurring weeds and moss, link to how to prevent weeds and moss between pavers.
Cleaning removes visible growth. Correcting drainage, debris accumulation and low joint levels helps address why it returned.
Should You Use Vinegar on Patio Pavers?
Vinegar should not be presented as a universal patio-paver cleaner.
It is acidic and may:
-
Etch limestone, marble and other calcareous stone
-
Affect some concrete surfaces
-
Alter certain sealers
-
Damage nearby vegetation when applied carelessly
-
React differently depending on product concentration
The Natural Stone Institute specifically advises that vinegar and other acids can dull or etch calcareous stone.
Some concrete-paver manufacturers publish limited vinegar treatments for specific stains or products. That does not mean equal-parts vinegar should be applied generously to every patio.
Follow the requirements for the exact paver product. When the material is unknown, use a pH-neutral cleaner instead.
Should You Mix Vinegar and Baking Soda?
No. Do not present vinegar and baking soda as a powerful patio-paver cleaner.
The acidic vinegar and alkaline baking soda react with one another. The visible fizz may look active, but much of the cleaning potential is neutralised during the reaction.
The mixture also does not address whether the pavers are concrete, clay, porcelain, sealed or natural stone.
Use a cleaner selected for the surface and stain rather than mixing household ingredients for visual effect.
Can You Pressure-Wash Patio Pavers?
A pressure washer can remove embedded dirt, but poor technique can:
-
Dislodge joint sand
-
Etch or mark the paver face
-
Damage sealer
-
Force water into unstable joints
-
Create an uneven appearance
For light cleaning, use a garden hose and brush first.
When pressure washing is appropriate:
-
Use a low setting
-
Use a wide spray pattern
-
Keep the nozzle moving
-
Maintain a consistent distance
-
Angle the spray across the surface
-
Avoid directing the stream into joints
-
Test a hidden section
-
Inspect the joint sand afterward
Unilock advises using a low setting and holding the spray at approximately a 45-degree angle to reduce joint-sand loss.
Pressure washing is not a substitute for stain-specific treatment. Water pressure alone may spread oil, damage joints or leave deep stains unchanged.
Protect the Joint Sand While Cleaning
The material between pavers helps stabilise the individual units and maintain consistent joints.
After cleaning, inspect for:
-
Empty joints
-
Low sand levels
-
Eroded edges
-
Loose pavers
-
Weed-filled gaps
-
Washed-out polymeric sand
If cleaning removed joint material, allow the surface to dry fully before installing compatible replacement sand.
Unilock recommends inspecting joints after pressure washing or heavy rinsing and replenishing the joint material when necessary. Polymeric sand must be installed and activated according to its label.
Do not pour new joint sand onto a wet or dirty patio.
Does the Patio Need to Be Sealed After Cleaning?
Sealing is not automatically required after every cleaning.
The correct decision depends on:
-
Paver material
-
Existing sealer
-
Surface condition
-
Joint material
-
Desired appearance
-
Manufacturer requirements
-
Moisture and weather conditions
Before sealing:
-
Remove stains.
-
Remove cleaner residue.
-
Confirm the joint material is complete.
-
Allow the surface to dry as required.
-
Test the selected sealer.
-
Follow the paver and sealer manufacturers’ instructions.
Applying sealer over moisture, stains, efflorescence or failed existing sealer can trap problems beneath the new coating.
When Cleaning Will Not Fix the Patio
Some patio problems may look like dirt but are actually caused by installation failure or physical deterioration.
Cleaning will not correct:
-
Sinking pavers
-
Rocking pavers
-
Broken units
-
Widespread missing joint sand
-
Water pooling
-
Failed edge restraints
-
Base settlement
-
Freeze-thaw movement
-
Severe sealer failure
-
Incorrect drainage
When water repeatedly collects in the same section, investigate the surface slope and foundation rather than repeatedly treating the resulting moss.
Review signs your NYC patio may need a paver upgrade when the problem extends beyond ordinary cleaning.
Homeowners considering a replacement or redesigned surface can also review our paver patio installation services in NYC.
Seasonal Patio-Paver Maintenance in NYC
Spring
-
Remove winter debris
-
Rinse salt and surface dirt
-
Check for freeze-thaw movement
-
Inspect joints
-
Check for moss in shaded sections
-
Identify new low areas
Summer
-
Clean food and grill spills promptly
-
Move metal furniture occasionally
-
Inspect irrigation overspray
-
Sweep regularly
-
Remove weeds before they mature
Autumn
-
Remove wet leaves
-
Prevent organic debris from remaining in joints
-
Clean stains before winter
-
Check drainage paths
-
Remove planters that trap moisture
Winter
-
Use snow-removal tools compatible with the pavers
-
Avoid scraping with unprotected metal edges
-
Follow the paver manufacturer’s de-icer guidance
-
Address drainage before freezing temperatures
-
Avoid leaving concentrated de-icing material on the surface
Keep Your Patio Clean Without Damaging It
The safest patio-paver cleaning process begins with the least aggressive method.
Use water, a mild compatible cleaner and a nylon brush for ordinary maintenance. Identify stubborn stains before selecting a stronger treatment, and protect the paver face, joint sand, sealer and surrounding landscaping throughout the process.
When the patio has sinking areas, recurring water buildup, widespread joint loss or damaged pavers, cleaning alone will not solve the underlying problem.
NY Pavers installs and improves paver patios across New York City. Our team can assess the surface, identify visible installation concerns and explain whether the patio needs cleaning, joint restoration, repair or replacement.
Contact NY Pavers for a patio assessment or call (718) 838-0982.