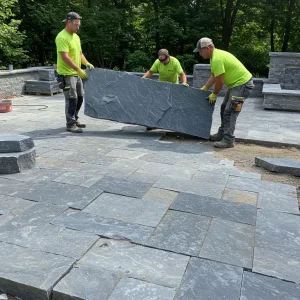
Laying pavers on a flat surface is already a detailed process. But when you’re working on a slope, it demands more attention. Whether you’re building a paver patio, walkway, or driveway on a sloped area, understanding the correct method is crucial. You need to ensure good drainage, prevent shifting, and keep the surface safe for walking.
How to Lay Pavers on a Slope
Before you begin, take a close look at the slope. You should know how steep it is and in which direction the water will flow. If water doesn’t drain properly, it will sit under the pavers and may cause them to shift or sink over time. A slope of around 1 inch drop for every 4 feet of length is usually ideal for drainage.
Use a line level, string, and tape measure to check the rise and run of your area. Once you know your slope percentage, you can plan your paver layout accordingly. Always work with the slope, not against it. Here’s how you can get it right from start to finish.

1- Prepare the Area for Excavation
Mark the area where you plan to install the pavers. Outline the space using marking paint or string. Remove any grass, roots, or debris from the surface. Then you can begin digging.
Excavate the ground deep enough to include your gravel base, sand layer, and the thickness of the pavers. For most projects, a depth of 7 to 9 inches works well. Remember, the depth may vary depending on the slope and the type of traffic the area will handle.
2- Create a Solid Base Layer
Once the area is excavated, you need to build a strong base. Start by laying geotextile fabric to prevent weed growth and improve stability. Then begin adding crushed gravel or crushed stone in layers.
Compact each layer with a plate compactor before adding the next one. This step is important on a slope because it keeps the pavers from shifting downhill. Make sure the base follows the natural slope. Don’t try to make it level, match it with the slope you measured earlier.
3- Add the Bedding Layer
After the base is compacted, it’s time to install the bedding layer. This is usually a layer of coarse sand that helps you level each paver. Spread the sand evenly and maintain the same slope direction.
Use screed pipes and a straight board to smooth the sand. Be careful not to walk on the sand once it’s been screeded. Any uneven pressure will create dips that can affect how the pavers sit.
4- Lay the Pavers Carefully
Start laying your pavers from the bottom of the slope and work your way up. This prevents them from sliding downward as you work. Place each paver tightly against the next and maintain straight lines using a string or a guide.
If you’re installing a curved or angled design, cut the pavers as needed to fit the shape. Make sure each paver is level with the one next to it but still follows the slope you planned.
5- Secure the Edges
Once the pavers are laid, install edge restraints along the perimeter. These are essential on slopes because they hold the pavers in place and prevent them from shifting or spreading. Use metal or plastic edging secured with long spikes driven deep into the ground.
Edge restraints must follow the slope as well. Make sure they’re tight against the pavers and check that they don’t move before securing everything in place.
6- Add Joint Sand and Compact Again
Sweep polymeric sand or fine joint sand into the spaces between the pavers. This locks them in and prevents weeds or water from breaking through the joints.
After the sand is added, run the plate compactor over the surface again. This helps settle the pavers and the joint sand. Then sweep another round of sand to fill any gaps that may have appeared.
7- Check the Drainage
The final step is to test the drainage. Hose down the surface lightly and watch how the water flows. It should move downhill smoothly without pooling in any spot. If you see standing water, you may need to lift a few pavers and adjust the sand layer.
Good drainage keeps your pavers strong and helps prevent erosion or frost damage in the long run.
Conclusion
Installing pavers on a slope takes more time, but when done right, it adds a clean, professional look to your outdoor space. You just need to work with the slope, not fight it. Focus on creating a strong base, follow the natural grade, and secure everything properly.
